 English
 Español
  Português
  русский
  Français
  日本語
日本語  Deutsch
  tiếng Việt
  Italiano
  Nederlands
  ภาษาไทย
  Polski
  한국어
한국어  Svenska
  magyar
  Malay
Malay  বাংলা ভাষার
  Dansk
Dansk  Suomi
Suomi  हिन्दी
  Pilipino
  Türkçe
  Gaeilge
  العربية
  Indonesia
  Norsk
Norsk  تمل
تمل  český
český  ελληνικά
  український
  Javanese
  فارسی
فارسی  தமிழ்
தமிழ்  తెలుగు
  नेपाली
  Burmese
  български
  ລາວ
ລາວ  Latine
  Қазақша
  Euskal
  Azərbaycan
  Slovenský jazyk
  Македонски
  Lietuvos
  Eesti Keel
  Română
  Slovenski
  मराठी
मराठी  Srpski језик
Installation Procedure of Wafer Butterfly Valve
2021-05-02
The correct installation of the clip on butterfly valve is related to the sealing degree of the butterfly valve and whether it will leak, including the safety in the working condition. The user should understand the installation process.
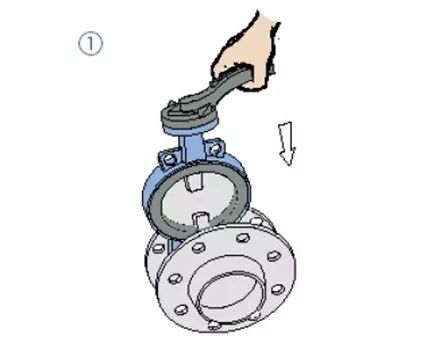
1.Place the valve between the two pre installed flanges as shown in the figure, and pay attention to the neat alignment of the bolt holes.
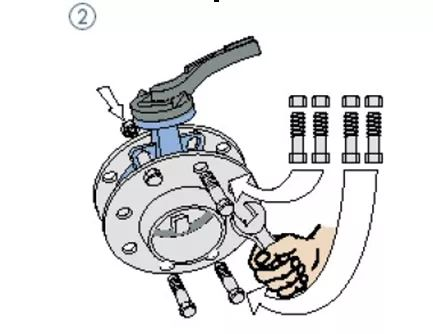
2.Insert four pairs of bolts and nuts into the flange hole gently, and tighten the nuts slightly to correct the flatness of the flange surface.
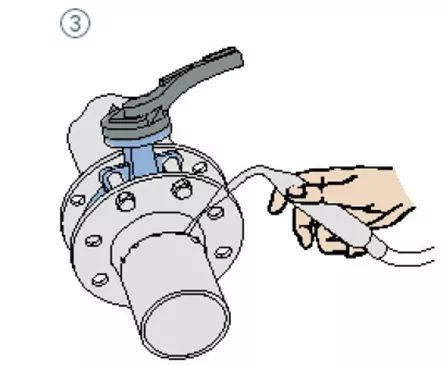
3. The flange is fixed on the pipe by spot welding;
4. Remove the valve;
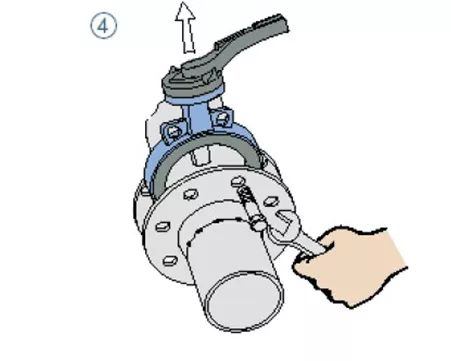
5. The flange is completely welded and fixed on the pipe;
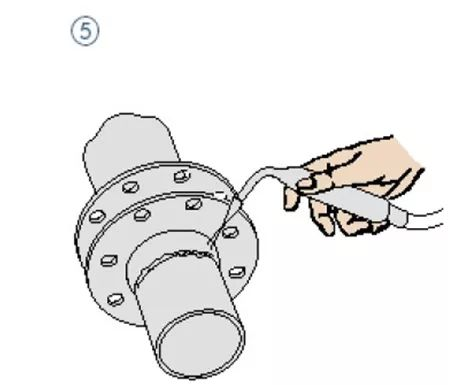
6. Install the valve after the weld is cooled. Ensure that the valve has enough space in the flange to prevent the valve from being damaged, and ensure that the valve plate has a certain opening;
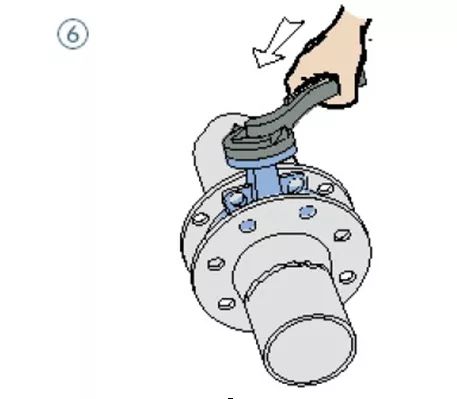
7. Correct the position of the valve and tighten the four pairs of bolts.
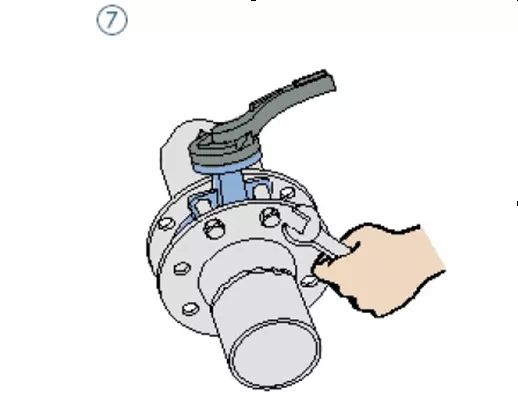
8. Open the valve to ensure that the valve plate can open and close freely, and then open the valve plate slightly;
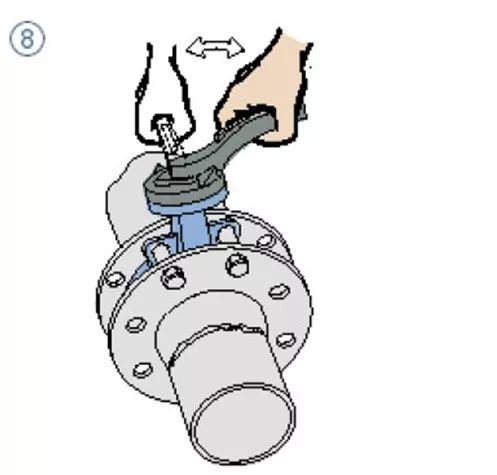
9. Cross evenly tighten all nuts;
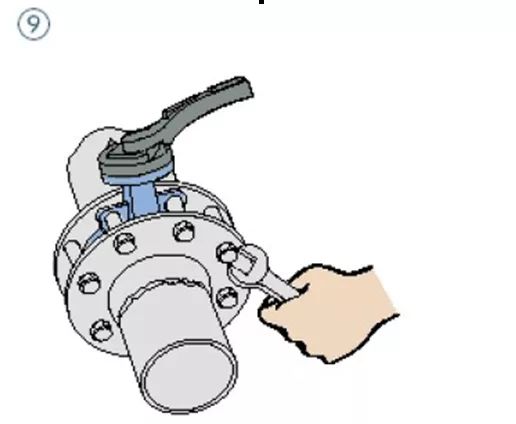
10. Reconfirm that the valve can open and close freely. Note: make sure that the valve plate does not touch the pipe.
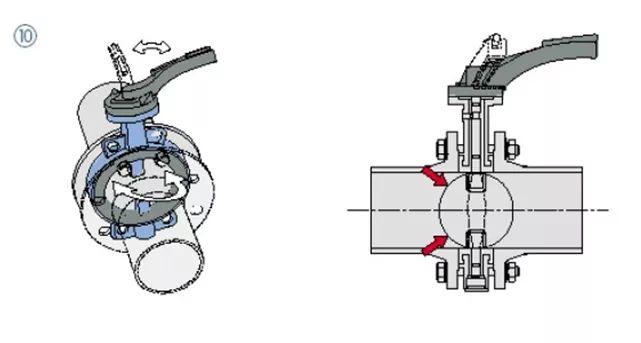
The installation of the clip type butterfly valve must be placed flat before installation. Remember not to bump at will. After pulling it to the length of installation, the clip type butterfly valve can not be disassembled at will without special permission in the field pipeline design. At the same time, the clip on butterfly valve can be installed at any position, but after the installation of the clip on butterfly valve is completed, the butterfly valve needs to be laid along the line, and a support is made for the clip on butterfly valve. Once the support is made, it is strictly forbidden to remove the support when it is used.


